To The Moon And Back
This tutorial was written by me on November 17, 2016 using my own ideas.
Any resemblance to others is coincidental and accidental.
This tutorial assumes you have a working knowledge of psp and is written in PSPX6.
Supplies:
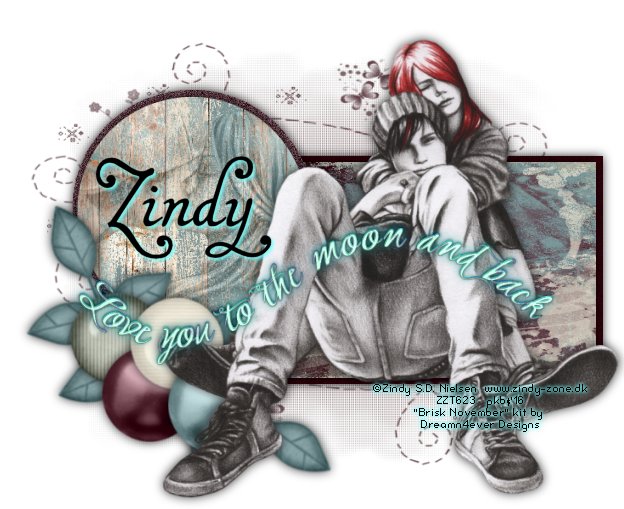
"Love Life" tube by Zindy S. D. Nielsen
"Brisk November" FTU scrap kit by Dreamn4ever Designs
Butterfly Mask 23 by Cheri at Graphic Groupies
"Love You To The Moon" Word Art by Graphic Groupies
Filters:
None
Fonts:
MalaTestaCK
Abbreviations:
DS_Drop Shadow
ANL_Add New Layer
EC_Eye Candy
GG_Gradient Glow
AS_Animation Shop
C/P_Copy and Paste
FF_Flood Fill
When working with templates, always Shift+D to duplicate, close original,
then on each layer, select with magic wand (or Select All, Float, De-float), ANL,
close/delete the original, do steps required in tutorial, select none
Background_Delete
ANL_cardstock paper 5
Apply mask
Leaves Shadow_Delete
Leaves_Delete
Gray Rectangle_cardstock paper 5
Black Rectangle_messy paper 2
Black Circle_cardstock paper 4
Adjust_Add Noise_Gaussian 35
Gray Circle_Wood paper 3
C/P tube close up
Invert_Delete_Select none
Blend Mode of tube_Luminance (L)
Opacity_50
Thanksgiving_Delete
Drop Shadow_Delete
Blessings_Delete
Credits_Delete
C/P Leaves 3
Free Rotate Left 30
Duplicate
Mirror
Flip
C/P Brad 1, Brad 2, Pearl 3, and Pearl 5 placing as shown
C/P tube
DS each template layer, tube, and each element_0_0_75_15_Black
C/P Word Art
Change Color to #0eaad9
Duplicate twice
Top WA layer_change color to #b3cfd2
DS_0_0_100_1_#716d6c
Repeat DS twice more
Add all correct copyright/license information
Name_MalaTestaCK_72_Black
DS_2_2_100_5_#70ffff
Save!!!